

This guide shows how to install the Iptanus File Upload plugin and start using it. If the plugin is already installed, go straight to step 2.
Step 1 — installing the free version
- Install it as you would any other plugin. Go to Dashboard → Plugins → Add New and type “Iptanus File Upload” in the search box. It appears as the first result. Press Install Now.
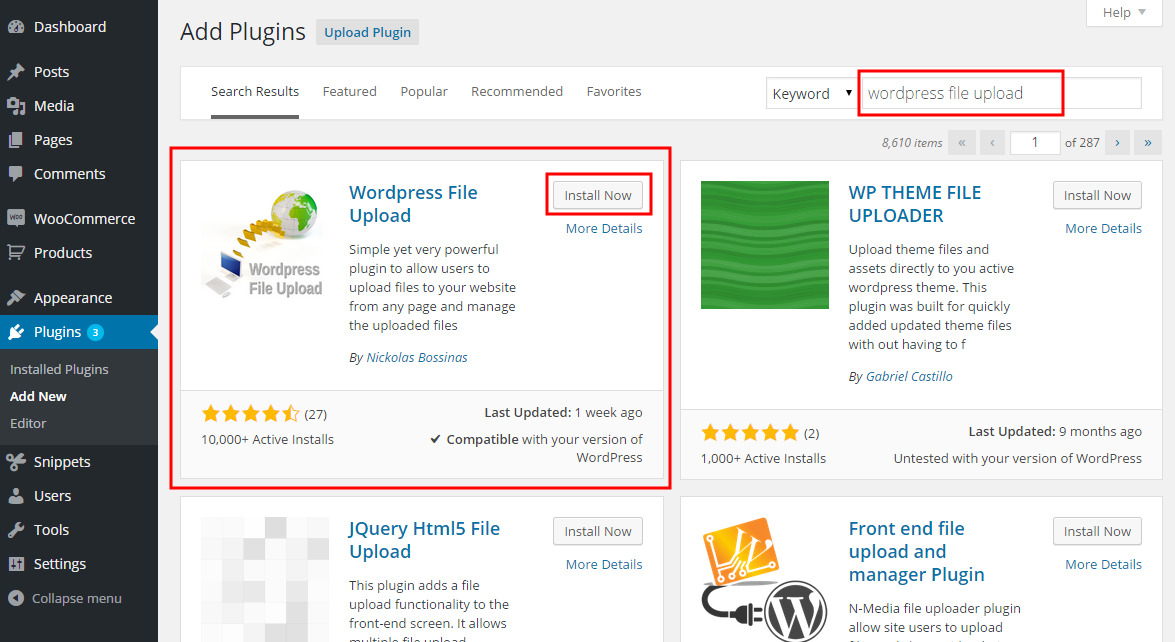
- When the installation finishes, press the Activate link.
- You can also install from a .zip file instead, using the Upload Plugin option shown in the image above.
Step 1 — installing the Pro version
- The Pro version is installed only from the .zip file you received when you bought the plugin. Go to Dashboard → Plugins → Add New and press the Upload Plugin button at the top of the screen, as shown in the image above.
- Choose the file from your computer and press Install Now.
- When the installation finishes, press the Activate link.
Step 2 — adding the plugin to a page or post
This step is the same for the free and the Pro version.
- Go to Dashboard → Settings → Iptanus File Upload. At the bottom of the screen is the Plugin Instances table. Press Add Plugin Instance:

- Choose the page or post from the dropdown and press OK.
- The plugin now appears in the Plugin Instances table.
Then follow this guide to configure the plugin with its visual editor.
If you have any further questions, please contact us.
The Iptanus team
Hi, just purchased the pro version and tried to upload a large file, keep getting error mesage stating the uploading file is too big.
the file that I am trying to upload is 800mb and is in a zip file format.
Can you advise
Upload function is not working, getting Unsucessful message. Here is my shortcode:
[wordpress_file_upload uploadpath=”customer_files” uploadpatterns=”*.zip,*.pdf,*.jpg,*.jpeg,*.tif,*.tiff,*.psd,*.ai,*.eps,*.png,*.svg ” maxsize=”2248″ createpath=”true” forcefilename=”true” redirectlink=”custom-tiles” notify=”true” notifyrecipients=”mitch@custom-tiles.com” notifymessage=”Image file uploaded.”]
[maybe you already have an FAQ on this but I can’t find it – would be a useful addition if you don’t]
I have the free version already installed and just purchased the pro version. What’s the process for upgrading? – do I need to uninstall the free version first? If I don’t will pro replace the free version or sit alongside? Will I have to reset the upload links I’ve already created or will they be maintained? Thanks.
In order to install the Pro version you need to deactivate the Free one first, because they use the same shortcode. All settings will be retained. No need to do anything else. There is an article in Iptanus explaining the installation process, but it does not mention this case, so thanks for the notice, I will update the instructions.
Nickolas
Multiple instances, with same settings are not behaving the same. One instance WILL send notify email, other does not. One instance shows multiple files selected in a list other does not????
Hi, do the instances have different ID?
Regards
Nickolas